
Rammed Earth Workshop - Working with Clay II

LEHM.WORKSHOP_WiSe22/23[ًWritten in black.]
LEHM.WORKSHOP_ SoSe23/23[ًWritten in blue.]
In both Workshops[ Written in red.]

By chance I discovered that my TU offers a workshop with the following description:
' In the workshop we want to explore the question of to what extent we can control the erosion process of clay by the architectural design of the external wall? To do this, we design a facade relief in clay, implement it on the campus as a rammed earth model and expose it to the weather.' LEHM.WORKSHOP_WiSe22/23
The workshop will start in the next few weeks and I will update my diary here.
whether I needed it or not, whether I like it or not...01/27/2023
Rammed Earth Workshop :
Tag 1- Kozeption
Tag 2- Entwurf
Tag 3 -Vorbreitung
Tag 4|5 - Stampfen der Lehmsteine
Tag 6 -Vermauern der Steine
Verwitterung
Brakes
Tag 1 - Kozeption 27.02.2023 10:00 Uhr Tag 1 - Kozeption 18.09.2023 10:00 Uhr
The day started with a short intrudction of the workshop and clay as a material.
We are addressing the same problem as in the first workshop; How to design a wall facade which can slow down the erosion due to rain.

On the first day there was an introduction to the workshop and the announcement of the goal of the work that we will carry out in the next few days. The aim of the workshop is to build two small walls out of clay. The bricks are designed by the students with different shapes in the hope that the design will slow the weathering process of the outside of the brick. We will leave the wall outside to study the effect of weathering on the different shapes.
I'm still a foreigner here. What made it even more difficult was that the subject was primarily aimed at architecture students. But I am a civil engineer. So, stranger to the power two. However, I was lucky to be included in a group of three brilliant architects

In the second worksop new elements were added as a new challenge: we need to build a corner, therefore we need to think a good design for a corner. It is up to us how we want to build the basement. To build means : Choose the material and think of your own design. The design should be able to stop or at least slow down Capillary Water.

After the small introduction we started right away.
Brainstorming : We discussed what can be the best design for minimal ersion on a big span of time.
The walls from the previouse workshop proved sehr hilfrech zu sein, da wir die erosion Fotos sehen könnten und vergleichen zweichen die 5 Wande.
ein paar studented haben sogar did chance benutzt dass es an den tag regnete und dann sind die schnell draußen gegangen um zu sehen wie die wasser die Wände schlägt
Helpful was : 1 - Booklet that we recived in the workshop with precedent for walls reliefes
2 - the walls that was already outside standing from the first workshop; they were a great source for analysis and learning.
3 - books from the Uni Bibliothek


Right from day one, we start brainstorming and discussing how best to combat weathering

One of the textbooks that was available for us to help with the work was ''Strategien des Umgangs mit Verwitterung bei Stampflehm-Mauerwek'' .
The Text is desseration work of Dr. Philipp Hoppe. The text equiped us with an understanding of different ideas and understanding of Brakes. Brakes is a very interesting concept. It was my first time to learn about them.
All what tries to stop the course of nature will exhaust the building. it is better to work with the nature. I am now againt using the word Bremse, it implifies kämpfen gegen Nature.
The egyptian design of the wall captured my eye for its streamlined design and smooth aesthitcs. This design somehow dances with water and facilitate the move of water towards the soil. Bremse should not keep the water still , Bremse should lead the water smoothly to the ground. Bremse should mininmize the Wiederstand.
For that I found this design below my favourite out of all designs we saw in work of Dr. Philipp Hoppe.
Different ideas; The desire to build the egyptian wellig wall:

During the Brainstorming I remembered the design of a house walls , the wall had the shape of wells as illustrated in the pic here.

I asked myself why this shape and how so eine Wand stärker gegen Verwitterung sein könnte, wenn es überhaupt. I wanted to try it. After a quick discussion with Philipp, I was not sure if we can proceed with such a design.
I didn't really understand the efficiency of such design gegen Wasser oder Verwitterung im Allgemein. Later on, it hit me that we design for two different climate zones; Geremany and Egypt.
By the end of the day we are expexted to present our initail design ideas. by the last workshop we had three ideas with one that we are more inclined to and tomorrow we work more on it
Tag 2 - Entwurf 19.09.2023 09:00 Uhr

This picture expalins a misunderstanding that I had since the previous workshop.
After the first workshop and after studying the 5 walls I came to the conclusion that the less we try to stop the water is the better ; in other words, I wanted that the water goes as quick as possible from the highst point where the rain hits to the ground
It is then in the second workshop that I had the conversation with Dr. Philipp and he corrected my misunderstanding. we are trying to slow down the movement of the water because the fast the move of the water the more it will take with from the clay on surface. at the same time we try drain the water as soon as we can; hence we created the inclination in our brakes
Tag Drei - Vorbreitung 20.09.2023 10:00 Uhr

The expierence and the day working on the timber muster will be written soon


After agreeing on the form and the relief of thebrick we started working on translating this to a mould that we use to produce the desired brick. It was here that I releaised that I missed something by not joining the Faculty of Architecture. my teamates were working with materials and modeling with ease while it was new for me to do modeling with hand

28.02.2023 Entwurf
Our classmate have been working on the 3d modeling of the wll as a part of the presentaion slides.
Dies ist ein Teil unserer Präsentation am zweiten Tag des Workshops.
Tag 4|5 - Stampfen der Lehmsteine 20|21.09.2023 10:00 Uhr
Tag 4|5 - Ausführung 21|22.03.2023 10:00 Uhr

later on we had to spend time to sort out the big stones. In the video u see how we used 3 Eimer .. Big one were the clay is not sorted. second smaller one were we let only small stones in. Third one where we try to remove all the small stones to use it for the outer face and corners so we insure a homoginieuse texture and structrue inside the brick.
After Talking with Philipp, er miente dass er wird beim nächsten mal Ton bestellen wo keine große Steine sind um die Zeit zu sparren. Die Zeit, die wir gebraucht um die steine zu sortiern.
it makes me wonder, did the ancient egyptian need to sort out the clay coming to him from the Nile ?
How different to work with a soil in Germany and a soil in the desert or by the Nile's bank ?
"The composition of clay is affected by the mieralogical and chemical compsitions of the parent material. This may be the solid bedrock or a non-lithified super-ficial layer such as boulder clay resting on bedrock. The clay mineral deposit is geochemically and biochemically controlled in the environment in which it exists natu-rally. Hence, deposit of a given type of clay has similar geologic characteristics which also have similar envi-ronmental signature that can be quantified by pertinent field and laboratory data and summarized in geoenvi-ronmental models for clay deposit type (Du Bray, 1995)."
- Environmental chrarctersitic of clay and clay-based minerals.

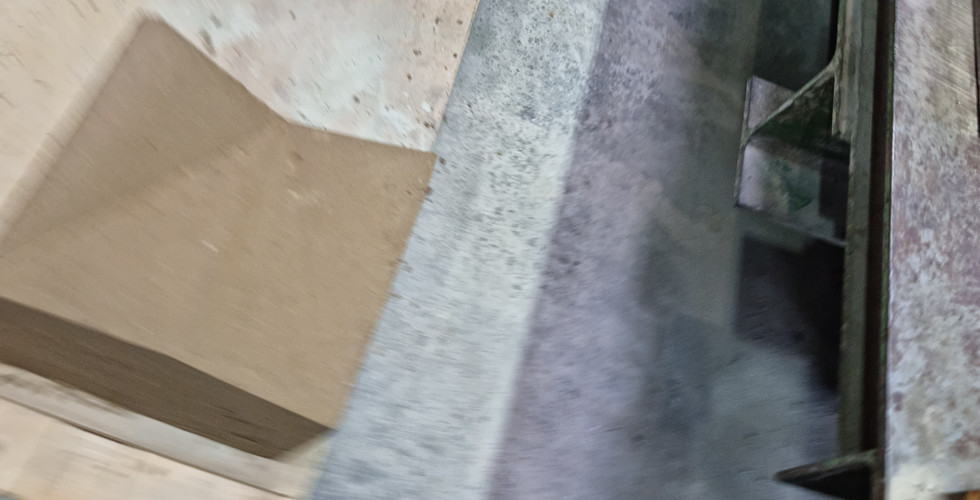
In second workshop, the previous expierence helped me to feel less exhausted since I was already expecting a quiete physical effort. I have worked with more confident. Howeve, I should have proposed that the mixture should be more Feucht. In the picture here, my inexpierenced eyes see two things; The dry mixture which is giving us a block where you can see small lines and cavities in the layer [compared it with the block with more water percentage in it below]. Picture willl be added next week
See the diffrence between the rammed part and the one to the left not rammed|Pounded yet and how to will go down.

The increase of feuchtigkeit can be seen here in the darker color and also in the almost full disapperance between the particles.
in the coming weeks will share a better pictue of the brick pounded with more water to see the difference more clear
As shown in the picture here my colleage is working on the corners. Corners have reseved extra compresion from us beisde carefully felling them with very fine clay mix, taking the stones even if small far from the cornners.
''Eine Möglichkeit der Erhöhung der Stabilität ist daher die Verwendung einer feinkörnigeren Materialmischung im Kantenbe-reich, was jedoch zusätzliche Herstellungsschritte und somit einen größeren Aufwand bedeutet. Eine andere Option, welche die Stein-geometrie betrifft, ist das Fasen bzw. Brechen der Kanten. Horizontal kommt dies vor allem für den unteren Steinrand, wie auch beim in Abb. 5-36 (vgl. Abb. 5-36, S. 171) gezeigten Beispiel, in Betracht. Ein Fasen der vertikalen Steinkanten erscheint hingegen problematisch, da hierdurch eine deutlich größere Angriffsfläche für das Regenwasser entsteht.'' 5.3.2.6 Steinkanten


The Third Day: To make the bricks, it is physically consuming process. During the work you learn by observing the outcome of your own work. the more we press, smoother the face we get. I still remember the comment of Philipp Hoppe: 'The Brick's face is smooth and that's strange' meaning that the normal facade of the brick has small cavities due to the different sizes of the Lehm contents. Our group was however careful to select the small particles for the facade/first layer, so we create a smooth facade. Ich bin der Meinung dass je smoother, desto besser. Der Grund Dafür, liegt daran dass these small cavities will either slow down the move of the water by 'Verhindern' or will keep it their for a bit of time. a smooth face sorgt für wienger Wiederstand. This openion has already changed as mentioned above, however, I still need to carefully and correct articulate my new undersanding

Here you can see the multiple times as we add clay and then bound it.
Here was the material dry, I suppose this is the reason behind the cavities that we see in the brick here .. later on we added more water to the mix and the reslt was dissappearing the cavities.
For next time; I need to bound brick with low Feuchtigkeit and take a picture, then I will increase the Feuchtigkeit and take a picture to see the difference.
Tag 6 - Vermauern der Steine und Schlusskritik22.03.2023 10:00 Uhr

Irony is, this day is important but I do not remember it in details.
I think even if I remember what I saw, I am not sure if I was ready to learn.
in the first time, I think I learned. it is in the second time that I start to really learn as I start to compare between the first time and the next times.
it was not easy to control the mortal and spread it equally on the side faces between to bricks. to spread the mortal below bzw. above the brick was an easy task.
The heavy weight of the bricks makes it hard to easily move, remove, the brick.
The wall to build was risking backpain because you have to bear heavy weight on your back for once. After building two small walls of the ones in the picture, I wanted to scream out of pain in my back. However, I did not.
The brick is between 25 kg to 30 kg.I can not imagine using the same Bricks dimensions and weight to build a small room. somehow I miss my first two bricks, die waren ganz leicht und klein.
''Die getrockneten Stampflehmsteine vermauern wir zu einem Fassaden-Mock-Up. Hierzu erstellen wir zunächst einen wasserfesten Sockel und vermauern die Steine auf diesem mittels Lehm-Mauermörtel. Abschließend wird die Abdeckung befestigt. So entstehen je Gruppe ein Eckrelief mit einer Größe von etwa 49 x 125 cm.''

Conclusion Diese Workshop hat meine Augen auf meine Schwäche geoffnet, darüber hinus hat der mir die chance gegeben zum ersten mal mit gestampft lehm zu arbeiten. Die Arbeit nimmt Zeit und Kraft, personlich bei der stampfen fehlt mir nur die Sonne. Starke Sonne wie bei uns in Ägypten war mein Wunsch.
Notes on the standing walls to the date

Verwitterung

Die Verwitterungsprozesse sind so alt wie die Gesteine selbst. Die Um- und Neubildung von Tonmineralen und Lehmen findet nicht nur tagtäglich an den Gesteinen, sondern auch in Böden und sogar an bewitterten Lehmoberflächen von Bauwerken statt.
2.3 Bindemittel Tonminerale , Lehmbau-Praxis : plannung und Ausführun
Observing the weathering and change


Brakes

The brakes(in yellow) are actually stopping the water. They are doing the job they where made for.
However, water shall not be stopped.
We can see the brakes actually collecting the water instead of helping to stream it to the ground with Zero or minimum contact with the clay surface.
A solution is design the "so called brakes" with inclinations towards the ground.
without inclination the water rests

How water hits
Water theoritcally coming straight from up to down It is now clear to me that in case the brakes are applied correctly they do slow down the water and I would assume that they even stop most of the water from moving to the level below when creating a groove in the wood as shown in the picture here.
Please remember to have brakes covering not only the whole but also goes 3 or 4 cm longer.
in the picture below is what happened when the brakes were designed as long as the longest protuding part of the brick.

Water hitting from the side
here is an observation that I wish I can confirm soon in case I was unlucky enough to find myself in the university standing under heavy rain. take a look at the picture below

It is as if the lower part protruding outwards taking all water coming from the sides and protecting the rest of wall. this can be seen after rain as only these parts are wet

The fact that this part stays wet after almost the rest of the object is dry can be ascribed to two factors :
The water is most of the time hitting from the side and reside on the nose projectin outside, so the water drops falls more there.
Second, the straight brakes with no inclination tends to keep the water on the brake instead of pushing it to the ground
Dimension of the brakes
when designing the brakes two parameters need to be in consideratin
1 - where does the water goes after it touches the brake?
Is the brake designed with inclination to push the water toward the ground instead of resciding on the brake?
did you design the brake with a groove in the lower part or a nose that works on pushing the water directly to the ground instead of letting the water move on the whole wall.
2 - did you create brakes with dimensions enough.
In my first workshop, this was a theme that we discussed and we intentionally created the brakes with extension at least 4 cm but I think what we missed was to create extnsion from behind, to protect the wall from behind and the result of having short brakes can be seen in the video as the water is collected above and then create continuous drops on one side of the wall leading to accelrated weathering that could have been avoided if the diemnsions were different on the backs side of the wall.

Picture from previous day showing how the back of the wall looks like after a strong rainy day, becuase the length of upper brake is so small that it is almost does not exsit
The purpose of the video is to show the importance of having an inclination angel when creating brakes for a rammed earth wall. The non-existence of inclination toward the outside to direct the water away from the wall might actually work to accelerate the erosion of the wall.
But the brakes is not the sole reason for the erosion of the wall located at the very left. the brakes size is very small here and can not be resposible to accumalte a big amount of water on such a small surface, especially during a light rain as the video shows.
What happened in this design is that we needed to design a bigger cover above the wall. In contrary to the other walls which was built as part of this workshop, this wall has a small wood cover above it. This resultued in the water accumulating over the wood then accumaleting and taking one angle or maybe more to drain water, due to the small dimensions the water is falling on the face of the wall [concentrated] this lead to a quick erosion of the corners where the water is falling . More interesting, it happened that the water falling from above rests on the small brakes as in the video leading to the water collected in this area around the small brakes where it is more wet and moist more than the rest of the wall


The following paragraph was already written before the second workshop. It's really worth mentioning that as I delve more in research I keep finding my previous notes to be absurd.
I wonder what I will say in the future. It is as if research were a process of minimizing absurdity
Grooves and cavities [notes after the first workshop]

in relief either intentionally as part of design or later due to wettering are also a reason for collecting water in the grooves area. In the following design we see the water gathering in an area created between the body of the wall and small objects were produced to help screeing the water Richtung Schwerkraft, the small object did not do this int he way it was ecpected. Reasons dafür : Es ist mir nicht ganz klar was liegt da hinter aber ich habe hier und bis jetzt zwei Vermutungen:
1 - the object was not placed with the right inclination enough to screen the water to the earth
2 - the material from which the object was made, somehow stored the moisture and trasported to the body of the wall
Lehmprüfung und Lehmaufbereitung, Dietmar Schäfer
2Lehmbau-Praxis Plannung und ausfürung